Connecting Dash to a Google Workspace service account
Connecting Dash to Google Workspace through a service account is recommended for most organizations. The setup procedure must be performed by a global administrator, and it requires access to the Google Developer Console. If this is not possible, then you can connect Dash to a standard or personal account instead.
Create a new project:
Visit the Google developer console. You'll need to be signed in with an admin account for your Google Workspace organization.
Click the project selector at the top of the page. It will either say "Select a project" (if you haven't previously created a project), or will show the name of your most recently used project. Click New Project.
Give the project a name (such as "Dash meeting room display") and make sure that the Organization and Location fields are both set to your organization. Click Create.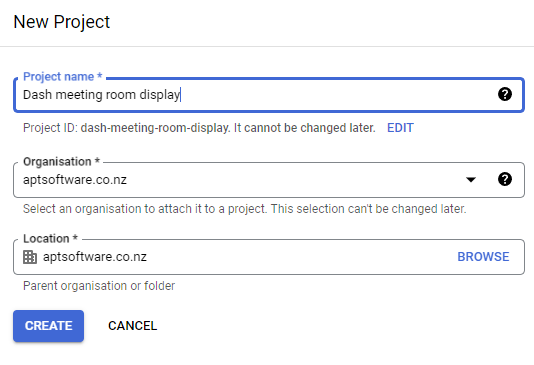
Enable APIs:
Visit these two pages and click the Enable button to turn on the Admin and Calendar API for your project:
Google Admin API
Google Calendar API
Before clicking Enable, make sure that the correct project is selected at the top of the page.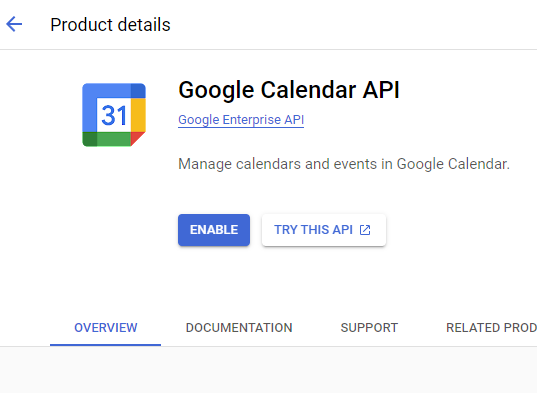
Create a service account:
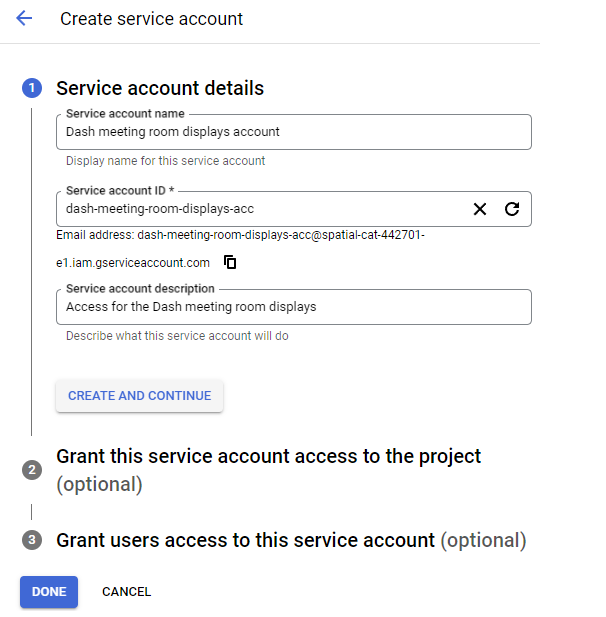
Make sure that your new project is selected at the top of the page, then click on Credentials in the menu on the left of the page. Click Create credentials near the top of the page, then click "Service account"Enter a name for the service account (e.g. "Dash Service account") and click Create and continue. Skip the Grant this service account access to the project section by pressing Continue, then click Done.
Grant access in your Google Workspace account:
Click on the newly created service account, then expand the Advanced settings section. Under Domain wide delegation, copy the service account's client ID.
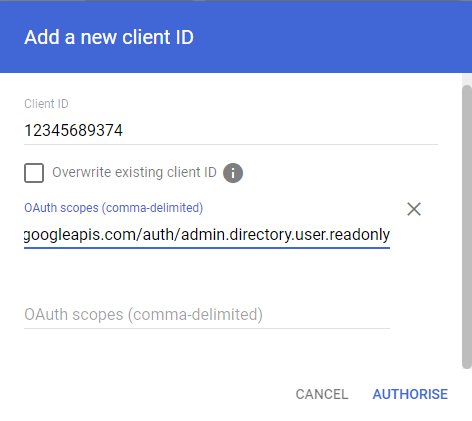
In a new tab, open the domain wide delegation section of the Google workspace admin console. Click Add new and paste the client ID you just copied. Enter the following OAuth scopes:If you would like to display the color of our meetings in the Dash display, you will also need to add the following scope:
Click Authorize when you're done to save the permissions.
You can find more information about how these permissions are used at the bottom of this page.
Create a private key:
Return to the previous tab (the service account overview in the Google developer console), and open the Keys tab. Click Add key and choose Create new key.
Choose "JSON" as the key type, and click "Create". Google will now download the key file to your computer. Note where this key file was saved.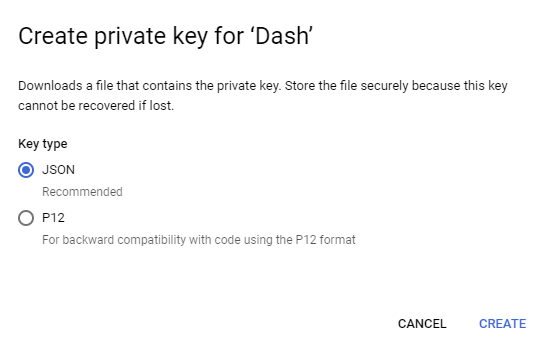


Connecting Dash to the service account
Once you have completed the steps above, you can connect Dash to your Google Workspace organization. Open Dash and go to Settings (the cog icon in the bottom right of the main display). If this is your first time using Dash, you will be asked to choose a calendar service immediately. If you have used Dash before you should see the name of the calendar service you are currently connected to, and a Change button. Click Change.
You should see a list of calendar services to choose from (Microsoft 365, Google, and your device calendar). Select Google Workspace or Google Account and then select Google Workspace Service Account. On the next screen, enter the following credentials into the app. It can be helpful to send the credentials electronically to the device first, and then copy+paste them into the fields.
- Client email: The client_email field from the file you downloaded in step 5. Make sure not to include the quotes surrounding the value.
- Admin user email address: The email address of a global administrator user account in your Google Workspace organization. Dash will query your user directory and perform actions on your resource calendars as this user, so the account needs to have permissions to access these resources.
- Private key: The private_key field from the file you downloaded in step 5. Make sure not to include the quotes surrounding the value.
Once you have entered the credentials, click Next and Dash will connect to your Google Workspace organization and give you a list of your organization's meeting rooms. For more information on getting Dash set up, please see our Quick start guide.
Dash requires several permissions to function. Below is a list of each permission, and the reason each is required:
https://www.googleapis.com/auth/admin.directory.resource.calendar - Dash uses this permission to detect and query your resource calendars.
https://www.googleapis.com/auth/calendar.events - Dash uses this permission to read events in your resource calendars, and to create or modify events when you make bookings from the Dash display
https://www.googleapis.com/auth/admin.directory.domain.readonly, and https://www.googleapis.com/auth/admin.directory.user.readonly - Dash uses these permissions to search your Google Workspace user directory when adding attendees or setting the organizer for meetings booked from the display
https://www.googleapis.com/auth/calendar.readonly - OPTIONAL If you book meetings in Google Calendar and set a color, Dash can show the color on the display. This permission is required so that Dash can look up the color in the organizer's calendar.
Dash devices communicate directly with Google Workspace, so none of your sensitive information is shared with us or our servers. The credential information is safely stored in your device's secure storage.
Managing multiple rooms?
Dash Enterprise lets you configure every display from one place instead of individually on each device. Deploy and configure Dash through our web management dashboard or your MDM system of choice.
Dash Enterprise also includes detailed room analytics so you can see how your meeting spaces are used.
We offer a fully-featured free trial - contact us to try Dash Enterprise free for one month.
Learn about Dash Enterprise